Wix Integration Guide
Integrate your Wix store with Helm to synchronise products, manage orders, and streamline fulfilment
Last updated 8 months ago

What is Wix
Wix is a cloud-based website builder and eCommerce platform that enables businesses to create professional online stores with ease. Known for its user-friendly interface and customisation options, Wix supports everything from product catalogues to payment processing and marketing tools
Connecting Wix to Helm allows you to unify operations, automate stock updates, and manage orders efficiently - all from a centralised platform

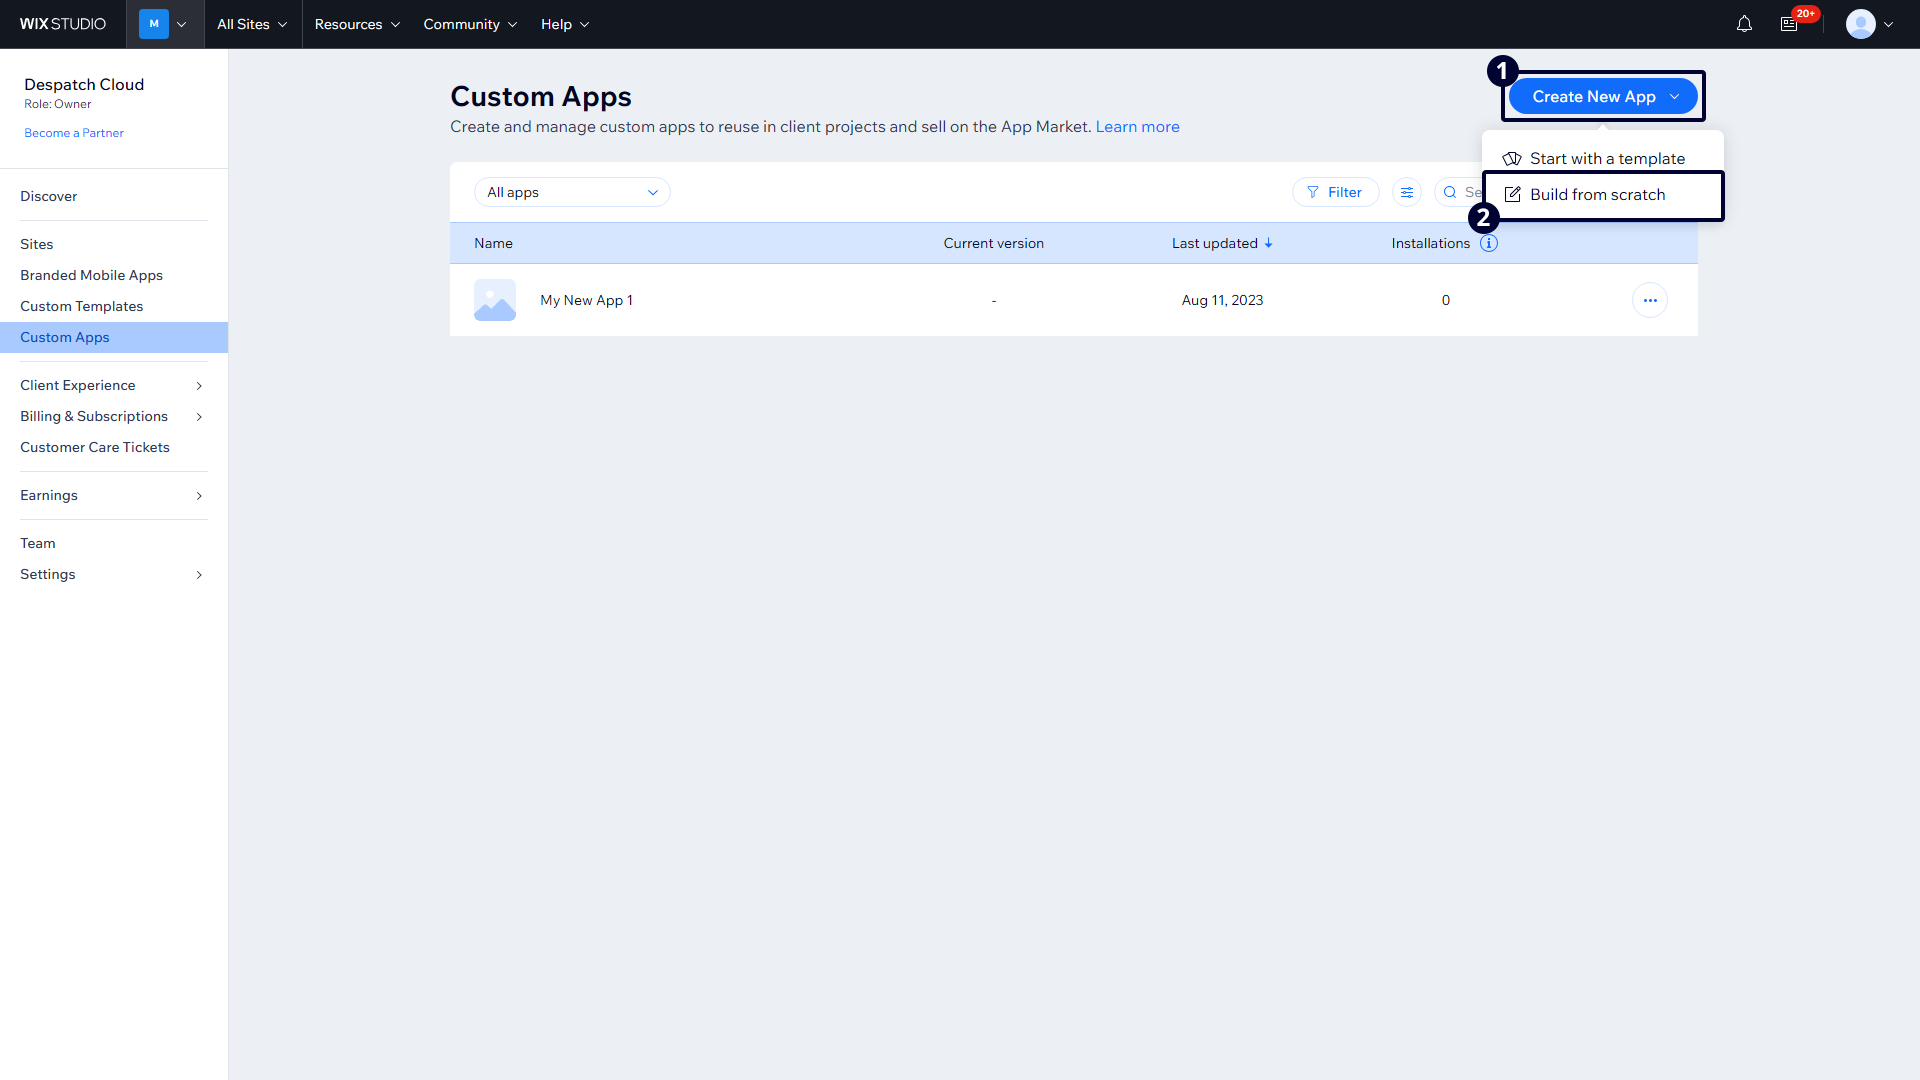
Creating a Custom App in Wix
As the first thing, please log in and access the custom apps page through the Wix Custom Apps page.
Start a New App:
Click the "Create a New App" button at the top right of the "Custom Apps" page.
Select a Build Option:
Choose "Build from scratch" from the available options. If you see "Blocks blank canvas," you can select that instead.
Choose Wix Blocks:
If you select "Build from scratch," a popup will appear. Click on "Wix Blocks."
Initiate the Build Process:
After the app builder loads, click the "Build" button at the top right of the page.
Name Your App:
When prompted, give your app a descriptive name and click "Save & Continue."
Set the App Version:
Wait a few seconds for the version screen to load. Then, select "Major version (1.0)" and click "Build" at the bottom right of the window.
Completion:
Your app is now created, and you’ve completed this process.
Click to maximise the image

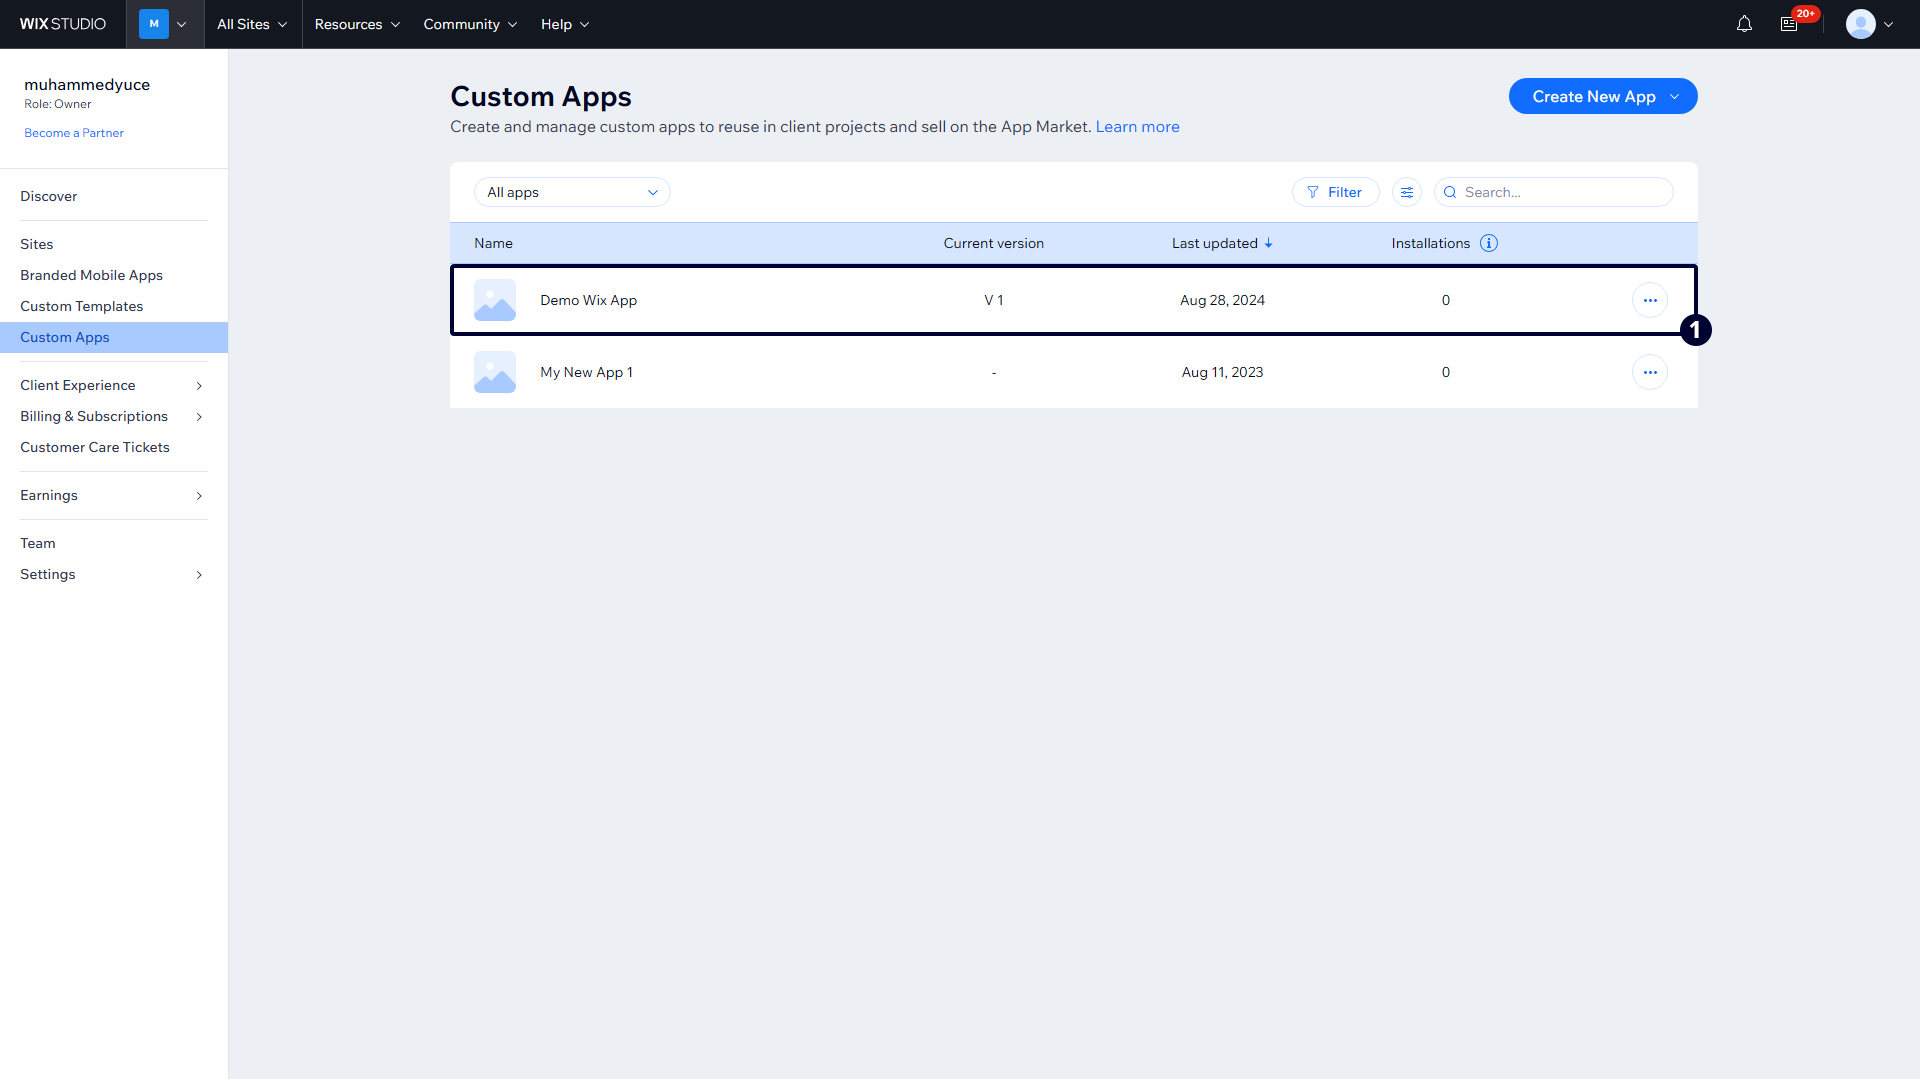
Managing App Permissions and Obtaining Credentials
Once you've completed the app creation, return to the Wix Custom Apps page again.
Access the App Dashboard:
Find your newly created app in the list, and click the three dots on the right.
Select From the Popup Window:
Select "Go to app dashboard."
Open Permissions:
From the left-hand menu, click on the "Permissions" tab.
Add Necessary Permissions:
Click "+ Add Permissions" at the top right in the permissions tab.
Select Permissions:
In the "Search by name or ID" section, search for and select the following permissions:
Store Management:
Manage Stores - all permissions
Read Stores - all read permissions
Manage Products
Read Products
Manage Orders
Read Orders
eCommerce Management:
Manage eCommerce - all permissions
Read eCommerce - all read permissions
Catalog Management (v3):
Read v3 catalog
Manage v3 catalog
Read products in v3 catalog
Product v3 read admin
Save Permissions:
After selecting the required permissions, click "Save" at the top right.
Verify Permissions:
Double Check Permissions to ensure all necessary permissions are in place. If any are missing, repeat the process to add them.Wix Permissions
Click to maximise the image
API PermissionsClick to maximise the image
Obtain OAuth Credentials:
Navigate to the "OAuth" tab in the left-hand menu.
Copy App ID and Secret Key:
Copy your "App ID" and "App Secret Key" on the OAuth page and note them down for integration with Helm.
Then, expand the "Advanced OAuth (optional)" section.
Enter the below URL in the "App URL" and "Redirect URL" fields:
https://production.channelapi.co.uk/authorization/connect/
Save OAuth Settings:
Once the URLs are entered, click "Save" at the top right of the page.
Click to maximise the image

Complete the Helm Integration
Back in Helm, fill in the following fields for the Wix channel:

Step 5: Configure Optional Settings
Customise your integration further via optional configuration tabs:
Settings – Define the fulfilment warehouse for this channel.
Stock Control – Enable Auto Sync Stock.
Brand – Customise company branding (defaults to General Settings).
Commercial Invoice – Set channel-specific invoice details.
Despatch Emails – Enable order despatch confirmation emails with tracking.
Feedback Emails – Enable automated feedback emails after fulfilment.
Adjust settings as required for your business operations.
Step 6: Finalise the Integration
Once all fields are completed:
Click Submit.
A success message will appear in the top-right corner.
Your Wix sales channel will now be active in Helm.
Completion
Your Wix store is now successfully connected to Helm. Orders and inventory will synchronise automatically, enabling efficient operations and centralised control.
📌 You may return to the Sales Channels area at any time to update or manage your Wix configuration.
