Inventory Management (CSV Imports)
Import or update product listings and stock levels using CSV templates.
Last updated 8 months ago

When to Use
The Inventory Import feature is essential during the initial system setup or whenever you need to perform bulk product uploads or updates. It is particularly useful for:
Uploading products for the first time
Updating stock levels or SKU information in bulk
Migrating data from another warehouse management system

Steps to Import Inventory
Manual Entry (Optional)
If you prefer to enter products one at a time, navigate to:Inventory → Create Inventory
Here, you can manually input the details for each productBulk Upload via CSV
For larger inventories or updates, you can use this Template File to populate the fields.Color-Coded Inventory (1).xlsx
11.6 KB• Spreadsheet
Just make sure to remove the notes, colour coding and save as a CSV before uploading or follow the steps below:a. Navigate to:
Imports / Exports → Inventory
Click to maximise the image
b. Begin the Import Process:
Select Inventory Import
Choose your Import Type from the dropdown (e.g., General Inventory, Stock Levels, etc.)
Select and upload your CSV file
Click Upload and Process File
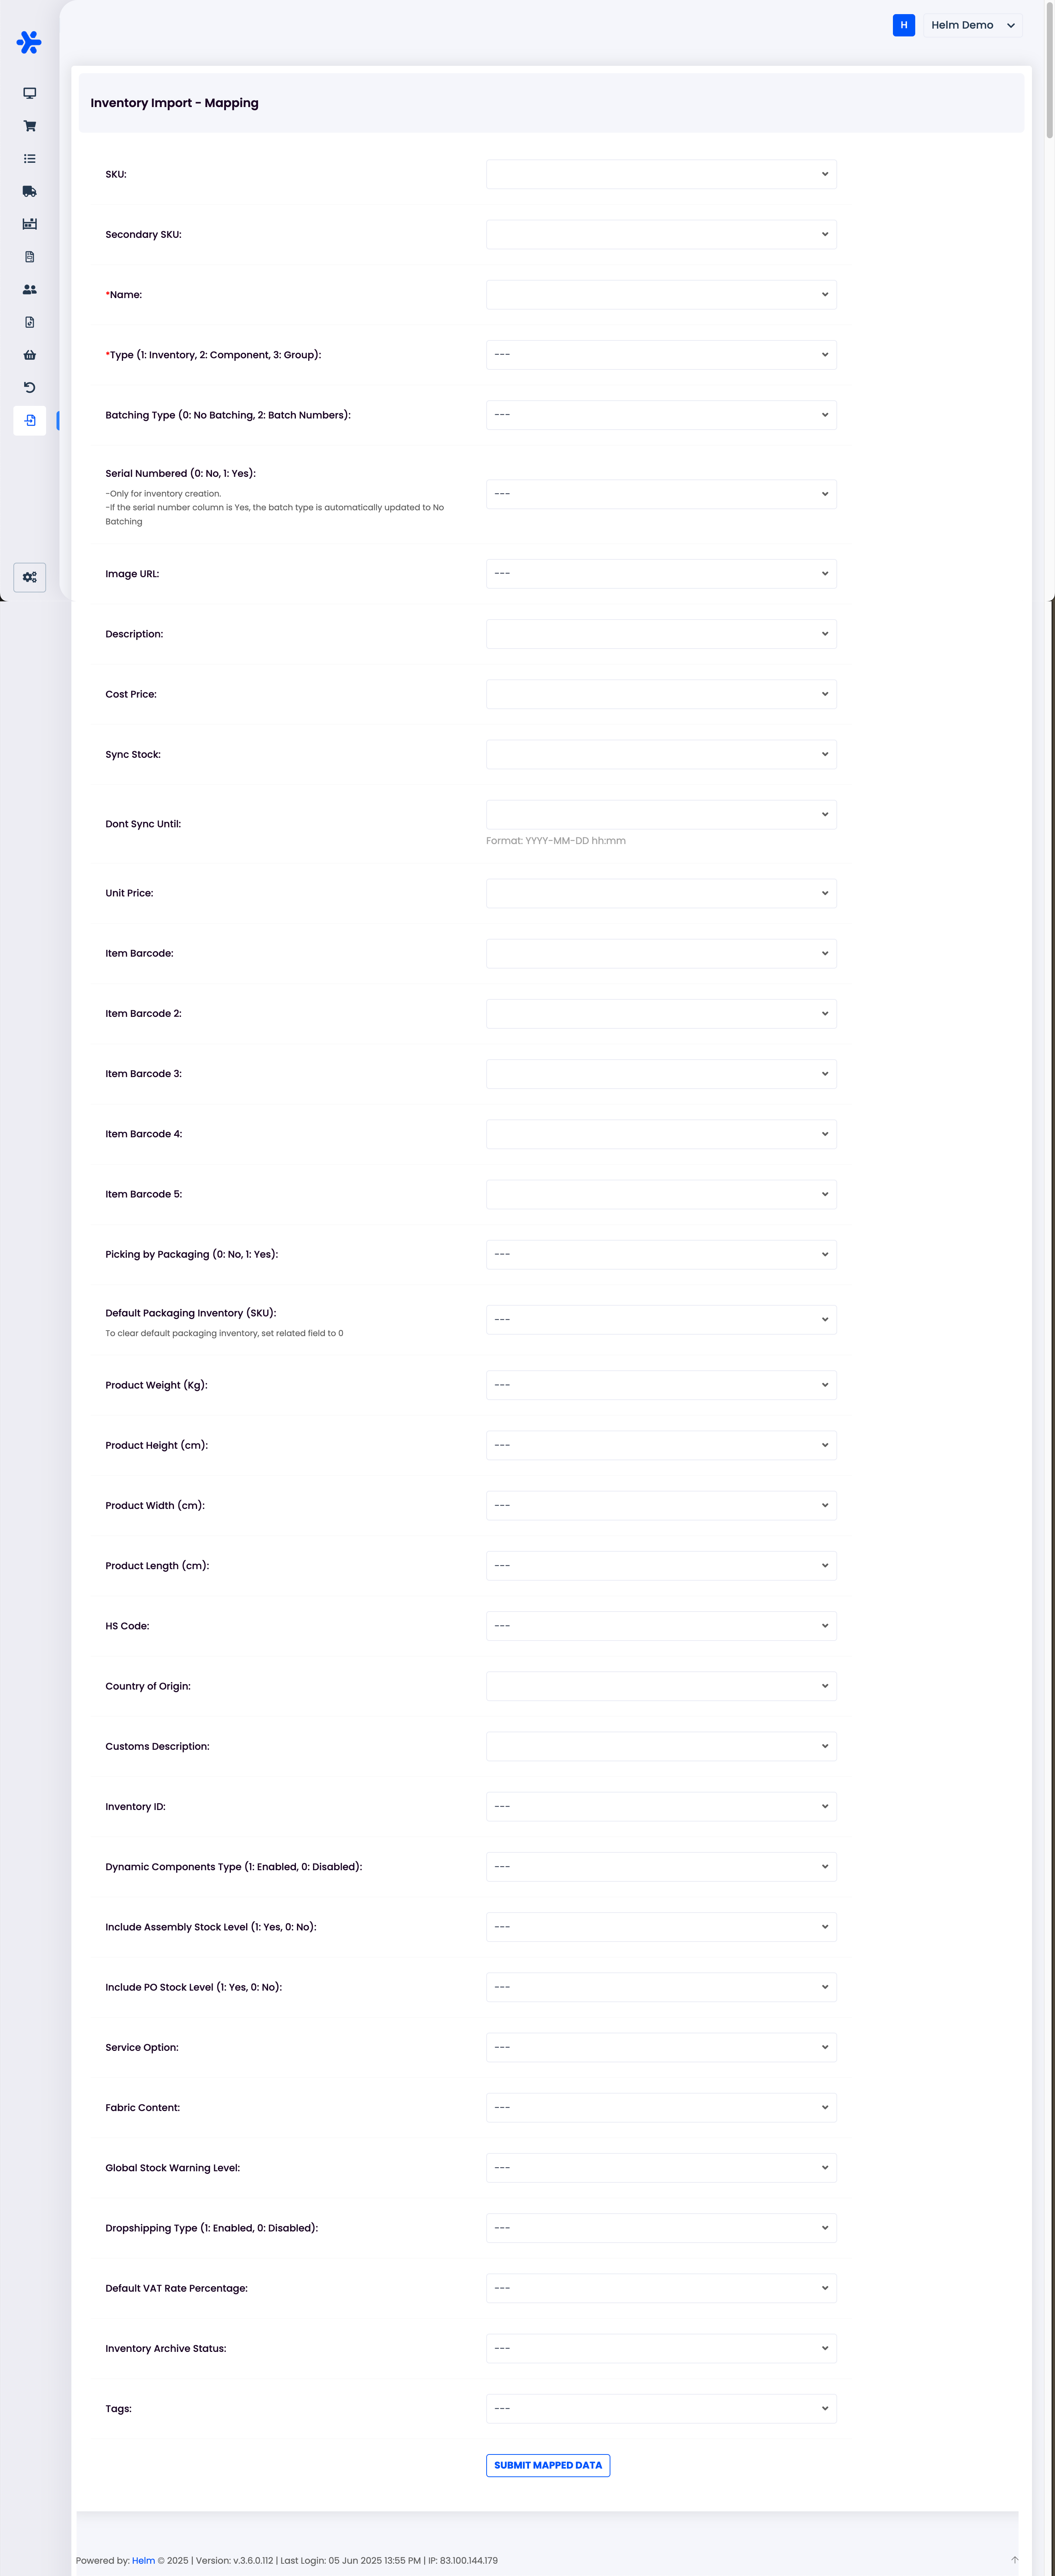
Map Your Data
Once uploaded, you will be redirected to the Inventory Import - Mapping screenOn the left-hand side, Helm’s required fields will be displayed (e.g., SKU, Name, Barcode)
Use the dropdowns to match these fields with your CSV columns
Ensure all necessary fields are correctly aligned
Finalise the Import
Once mapping is complete, click Submit Mapped Data
Helm will validate and process the entries, making them available within your product catalogue
Click to maximise the image
Example Scenarios
Migrating from Another WMS:
Seamlessly transfer product data when switching from your previous systemBulk Barcode or Price Updates:
Make mass updates to product identifiers or pricing without editing items individually
