B2B Wave Integration Setup Guide
This page outlines the steps required to integrate B2B Wave as a sales channel within Helm. You’ll be guided through retrieving your API credentials, installing the channel, and configuring the connection for seamless synchronisation of orders and customer data.
Last updated 9 months ago

Prerequisites
Ensure you have administrative access to Helm.
Have an active B2B Wave account.
Access to your App Code and API Token from within B2B Wave.

Step 1: Retrieve API Credentials from B2B Wave
Log in to your B2B Wave account via your unique company URL:
https://your-company-name.b2bwave.com/users/sign_inReplace
your-company-namewith your registered subdomain.
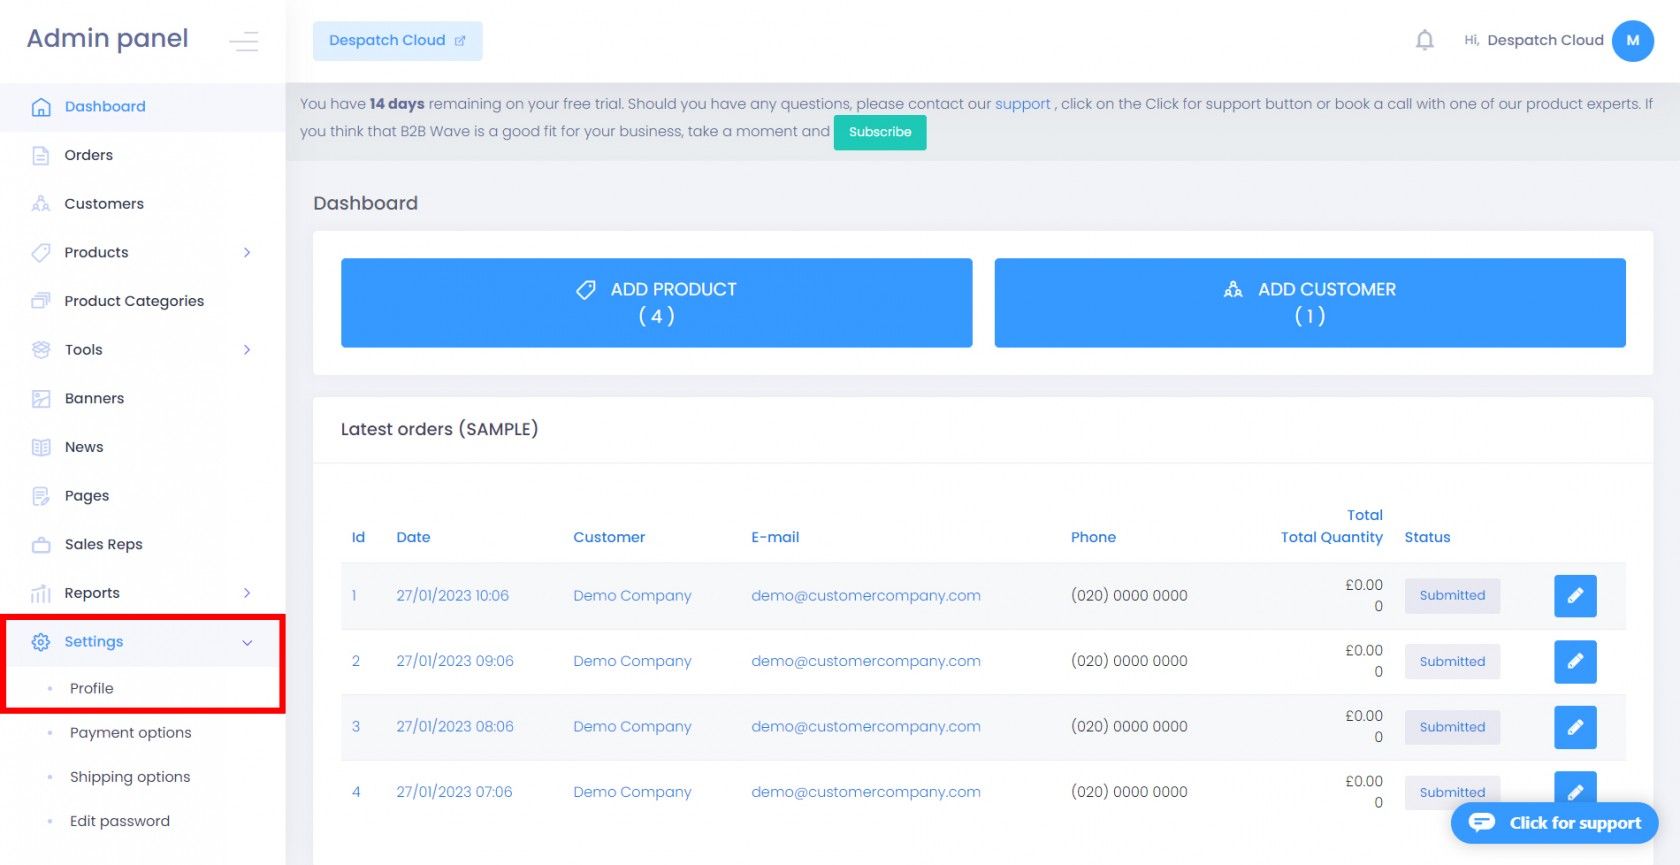
Once logged in, click on the Settings icon in the side menu to expand it.
Click on Profile, located near the bottom of the sidebar.
Navigate to the API Configuration tab. Here, you’ll find your App Code and API Token.
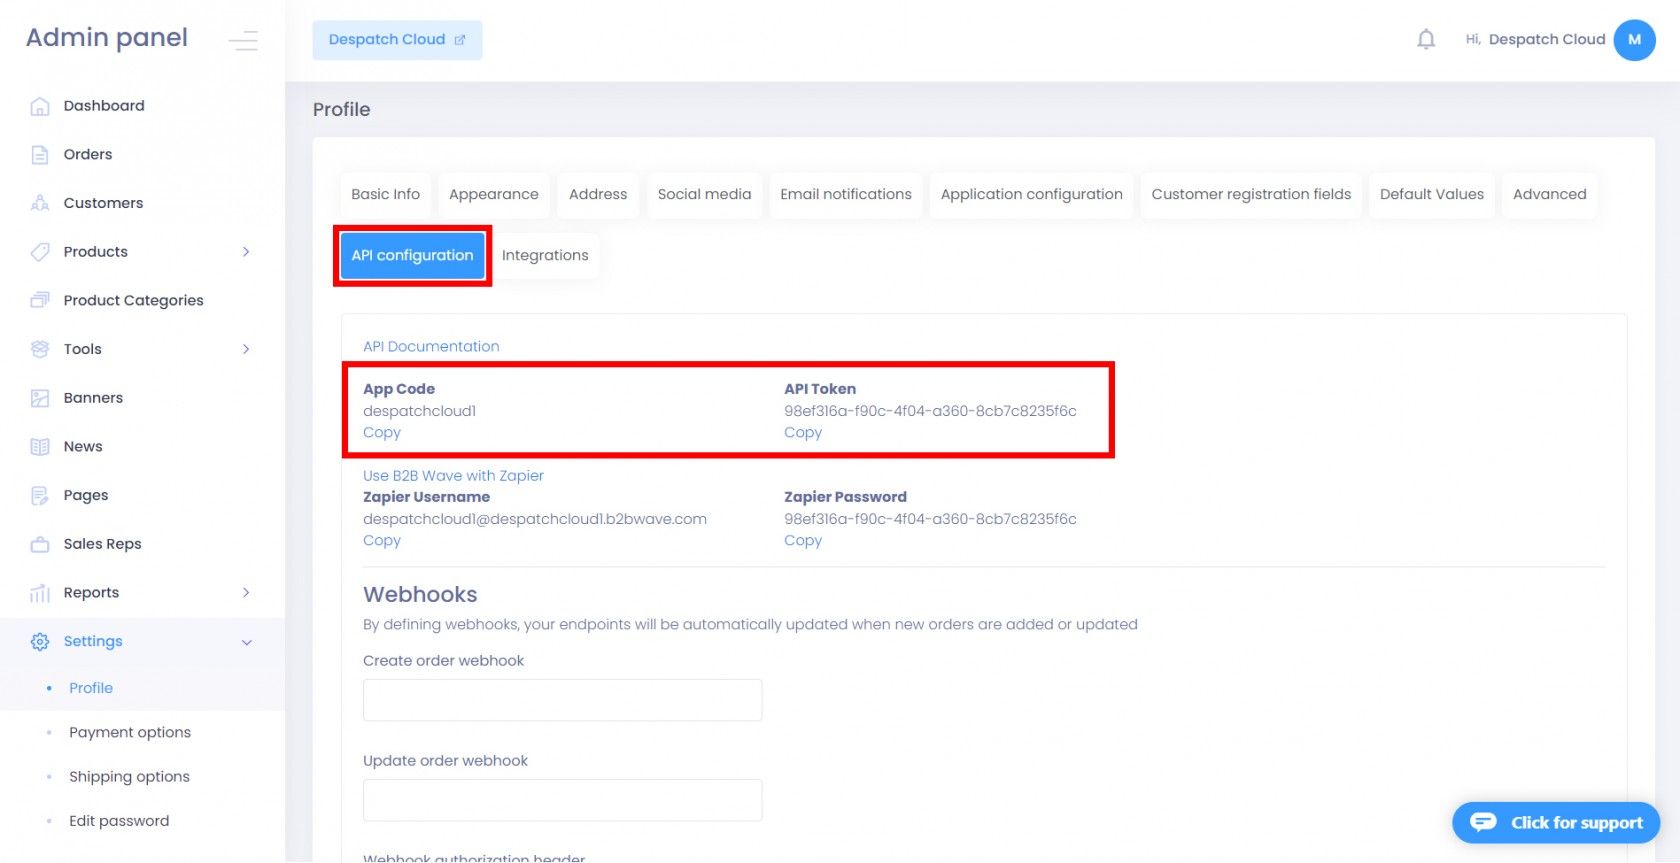
Important: Keep these credentials secure. You will use them in Helm during the integration process.

Step 2: Access the Sales Channels Area in Helm
From your Helm dashboard, click Settings in the bottom-left corner.
In the navigation panel, select Sales Channels.
From the list of available integrations, find B2B Wave and click Install.
Step 3: Configure the Integration Fields
You will now be presented with a setup form. Complete the following fields:
Active
Toggle ON to enable the integration.
Name
Enter a unique identifier for your B2B Wave store.
Example:
B2B Wave – Wholesale UK
Hostname
Enter your B2B Wave hostname (the company subdomain only, without https:// or /).
Example:
your-company-name
App Code
Paste the App Code retrieved from your B2B Wave account.
API Token
Paste the API Token from your B2B Wave account.
Explore any additional configuration options to align the integration with your sales processes or data preferences.
Warehouse Selection
Click Settings in the top tab and choose the Helm warehouse from which goods will be despatched for this integration.
Explore the configuration settings to further tailor and enhance your integration according to your fulfilment strategy and vendor agreements.
Optional configuration tabs include:
Stock Control – Set up Auto Sync Stock
Brand – Setup your Company Information for this sales channel below. By default your Company Information as set in General Settings will be used.
Commercial Invoice – Setup your Commercial Invoice Information for this sales channel below. By default your Commercial Invoice Information as set in General Settings will be used.
Despatch Emails – Do you want Helm to send out an order despatched email with carrier tracking information (if applicable)? If you do setup your Despatch Email for this sales channel below.
Feedback Emails – Do you want Helm to send out an order feedback email? If you do, setup your Despatch Email for this sales channel below.
Adjust these according to your business requirements.
Once all fields are complete, click Submit.

Completion
Once submitted:
A confirmation message will appear on the top-right corner of your screen.
The B2B Wave sales channel will now be listed among your integrations in Helm.
Data will begin syncing automatically according to your configuration.
Additional Notes
You can return to Settings → Sales Channels → B2B Wave at any time to make changes.
Ensure your API credentials remain current and valid to avoid any disruptions in data flow.
For stores operating across multiple regions, you may install separate B2B Wave channels with distinct names and configurations.