Turning on Batch Control in Helm
This page explains how to enable and use batch control in Helm for products tracked by batch numbers and expiry dates.
Last updated 12 months ago

Batch control in Helm:
A civilised arrangement by which your stock behaves itself.
This page guides you through enabling Batch Numbers for products, adding batched quantities with their expiry dates either at a location or via bulk import, and understanding the resulting allocation: first‑in, first‑out by expiry rather than by location priority.
You will learn when and how the system allocates automatically across picks and sheets; how to override a specific order using Select Batches and then re‑allocate; and where to find the reports under Settings: Batch/Serial Numbers and Expiry for oversight of ageing stock, compliance, and audit‑friendly documentation.
Purpose:
Enable batch numbers and expiry‑based allocation so stock flows first‑in, first‑out: accuracy improves; waste diminishes; auditors applaud.
Before you begin:
You cannot change a product’s batching option if it currently has stock on hand; zero the stock first.
Decide whether staff will usually rely on automatic expiry‑based allocation or occasionally override batches per order; both are supported.

Step 1: Set the product to use Batch Numbers
Open the Inventory in Helm.
Ensure on‑hand stock is zero; adjust via stock movements if needed.
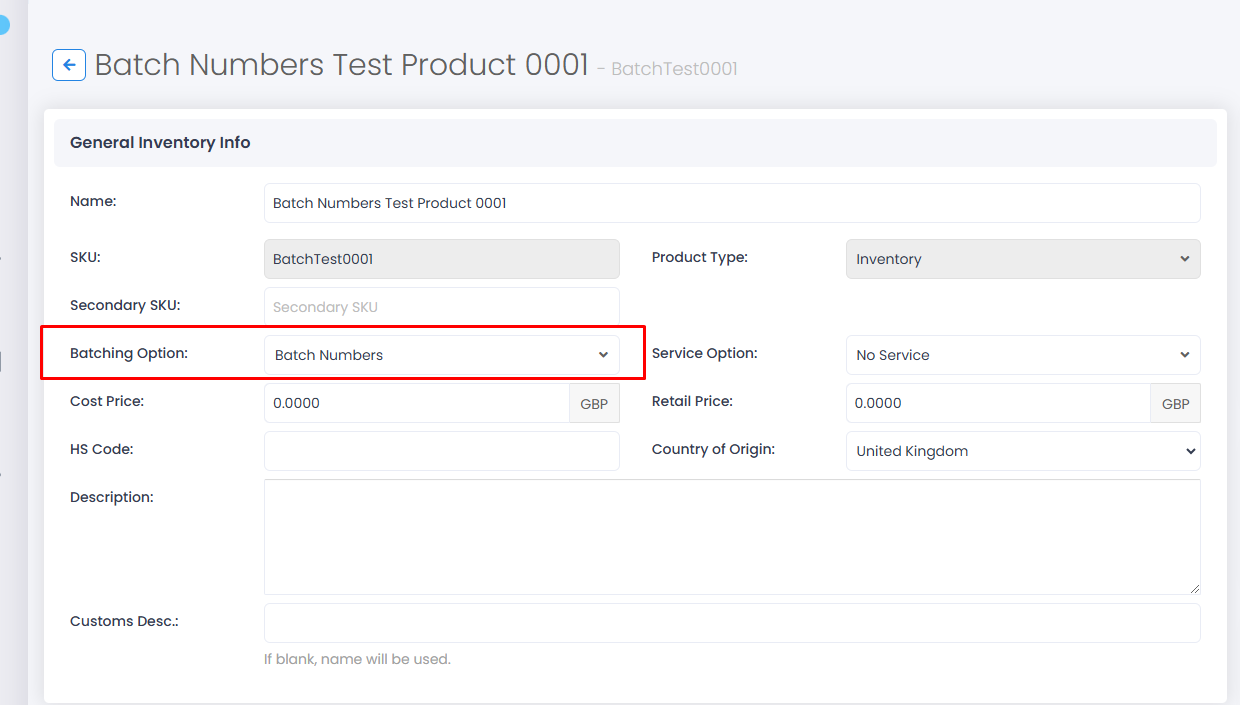
Set Batching Option: Batch Numbers, then click Save.
Step 2: Add batched stock with expiry dates
Option A: Add at a location
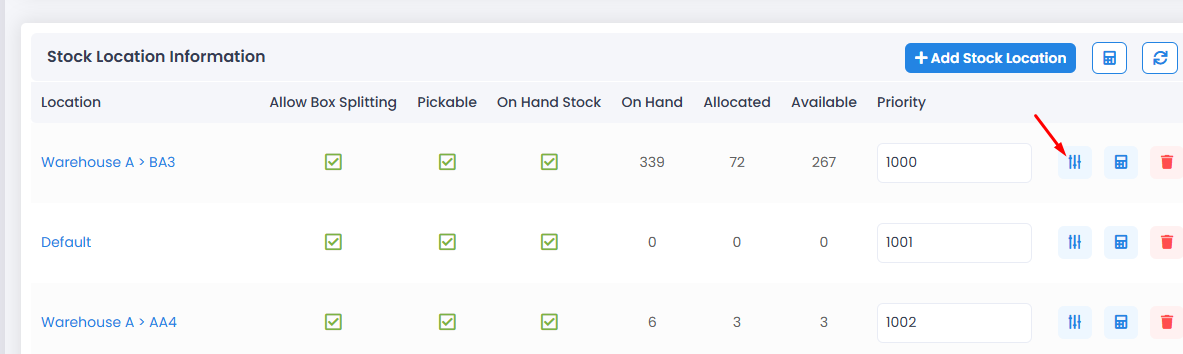
Go to the product’s Locations panel; click Manage/Add Stock Location next to the target location.
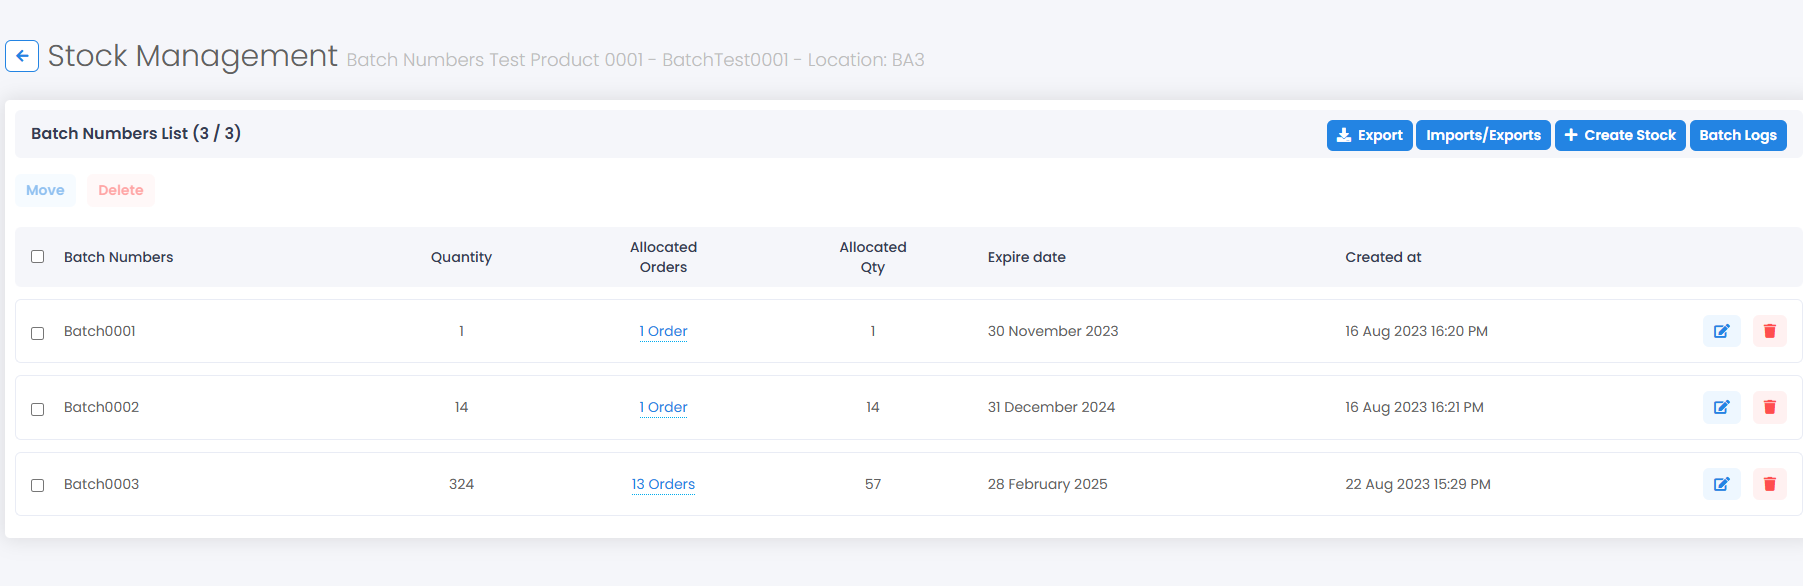
Add batch entries: Batch Number, Quantity, Expiry Date; save.
Option B: Import in bulk
Use Import Type: Batching Numbers.
Prepare your file with required columns (e.g. SKU, Location, Batch Number, Quantity, Expiry Date).
Upload and validate; confirm import.
Step 3: Understand allocation behaviour (FIFO by expiry)
Helm allocates batched items by earliest Expiry Date, not by location priority.
This applies when you:
create picks,
print picking sheets,
use bulk Allocate actions,
or click Allocate Order.
Result: the system prefers the batch with the soonest expiry to minimise aged stock.
Step 4: Override batches for a specific order (when needed)
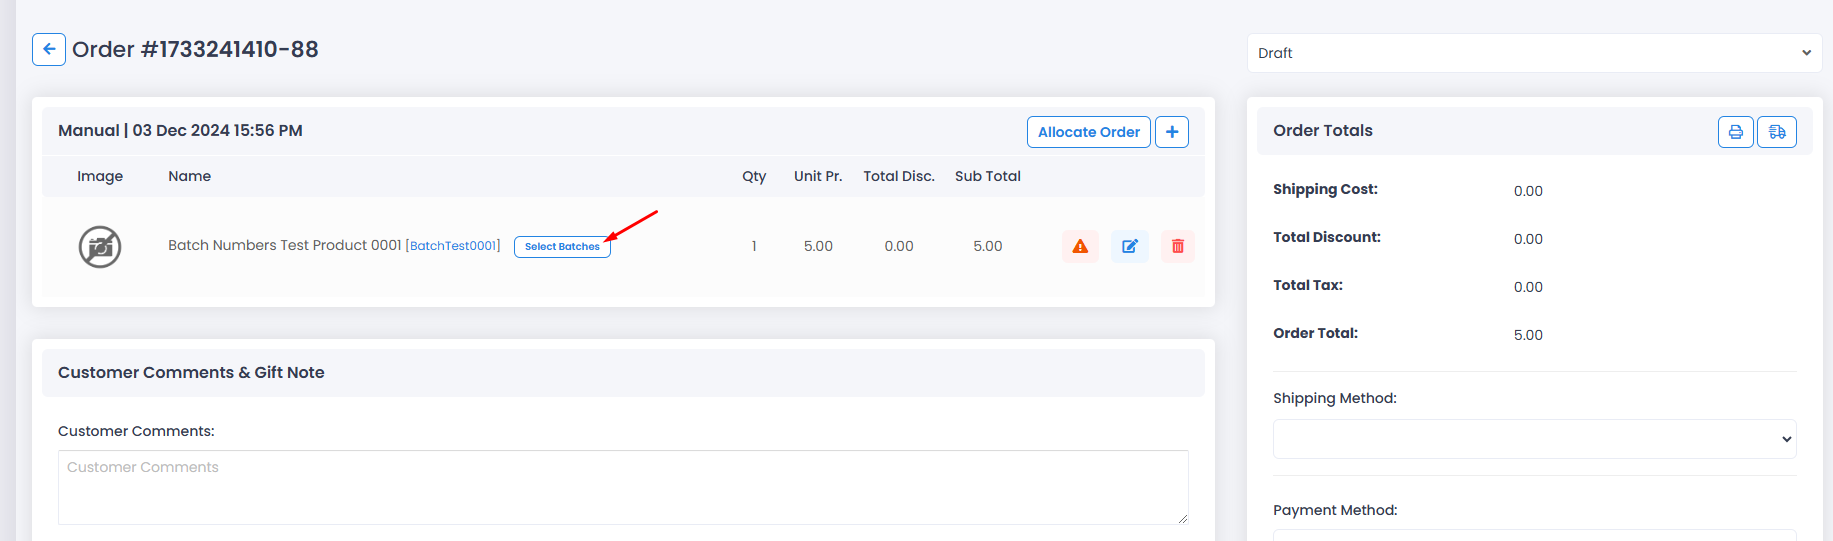
Open the order; locate the product line.
Click Select Batches; choose the desired batch(es) manually.
Click Allocate Order again to replace the automatic FIFO allocation with your manual selection.
Note:
Re‑allocation is required whenever you change batch choices post‑allocation.
Step 5: Reports and oversight
Navigate to Settings: Batch/Serial Numbers and Expiry for batched‑product reports.
Use these to monitor ageing stock, upcoming expiries, and batch movements.
Good practice:
Keep batch numbers human‑readable yet unique; avoid reusing identifiers.
Always record an Expiry Date; if an item has no expiry, adopt a convention (e.g. far‑future date) and document it.
Train packers to verify batch on scan; mispicks often occur when labels and batch sheets diverge.
Periodically review FIFO effectiveness; if regulatory or customer requirements demand specific batches, use manual selection and re‑allocate.
Troubleshooting:
“Cannot change batching option”: the product still has stock; remove or transfer stock, then retry.
“Allocation picked the wrong location”: expected - batch FIFO overrides location priority; confirm batch expiries or use manual selection.
“Manual batch not used at pick”: re‑click Allocate Order after selecting batches to enforce the override.
Outcome:
You have enabled batch control with expiry‑led allocation; stock moves sensibly; exceptions are controllable; and reporting keeps everyone honest.

Was this helpful?
Still need help? Share an idea